Documentation
This page contains all the information needed to get you started working with IntelliJ AEM.
Getting Started
This sections provides information about the steps required to get started with IntelliJ AEM including installation of the plugin and initial project setup.
Installing the Plugin
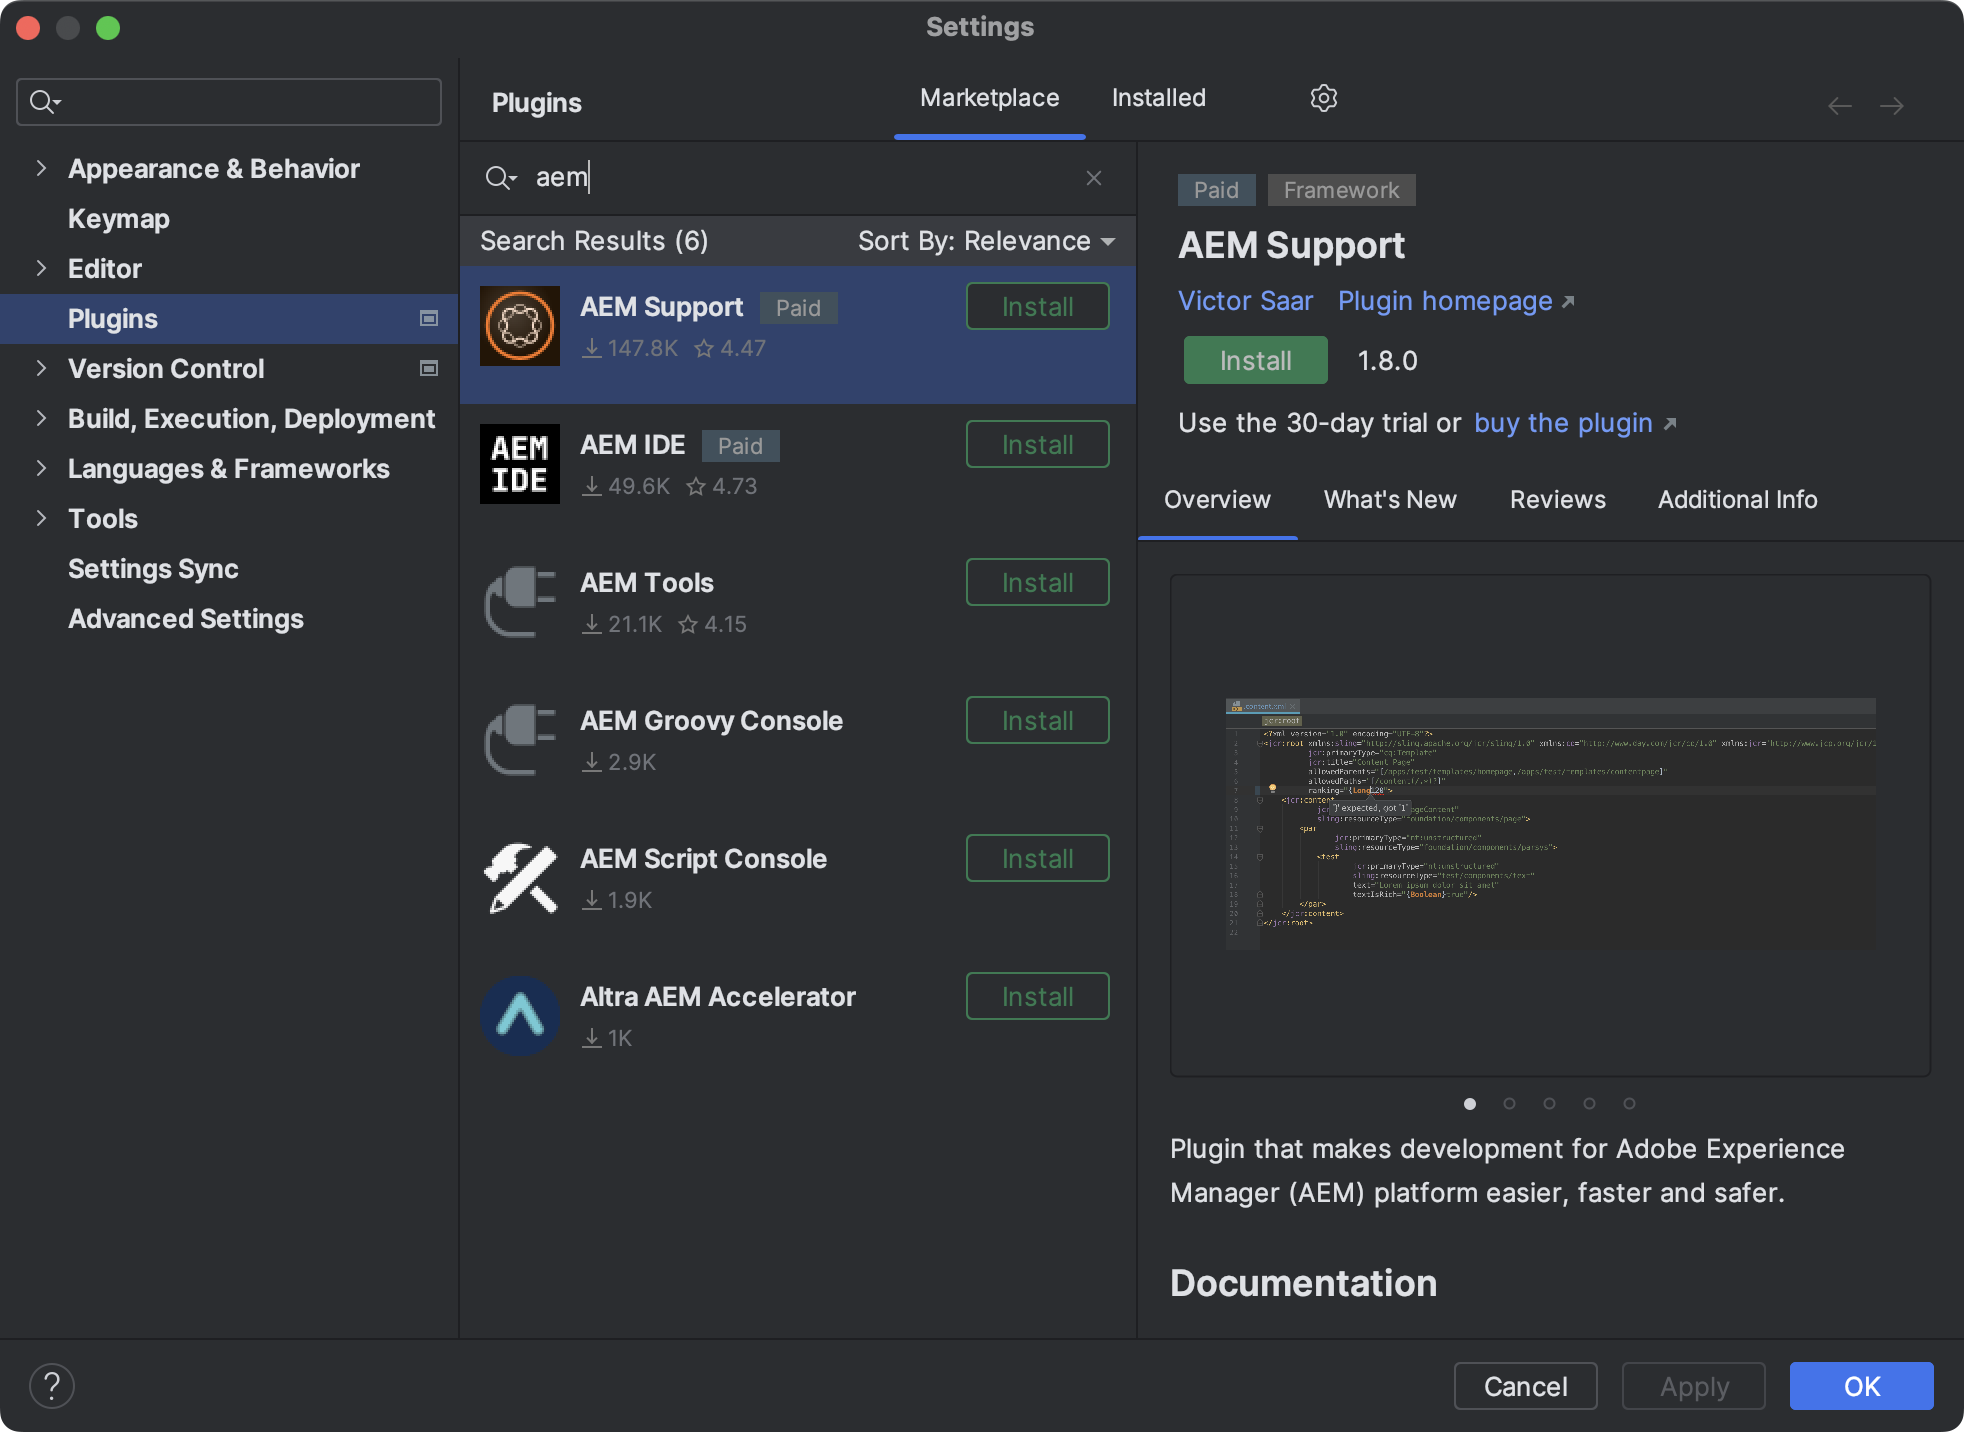
Installation of IntelliJ AEM is done through the IDE's integrated plugin manager. From within the application, open Preferences and select Plugins from the list on the left-hand side. This will show you the list of currently installed plugins.
Next, click the Marketplace tab, which allows you to browse through the plugins available on JetBrains' Marketplace. Enter "AEM" into the search field in the top left corner and select AEM Support from the list. Finally, click the green Install button and restart the application. The plugin should now be installed and you can setup your project.
Enabling AEM support
First thing you need to do after installation is to enable AEM support, as most of IntelliJ AEM's functionality is only available when it's activated. This can either be done globally, i.e. for the whole project, or for individual modules. However, the latter is only available in JetBrains IDEs that support frameworks, e.g. IntelliJ IDEA Community and Ultimate.
Enabling support for whole project
Enabling the plugin for the whole project is available in all IDEs that are supported by the plugin. Simply open Preferences, select Languages & Frameworks / AEM Support from the sidebar and enable the checkbox at the top of the settings panel.
Enabling support for individual modules
To enable the plugin for individual modules, right-click a module in the Project tool window and select the Add Framework Support... menu entry. Then search for AEM in the list and enable it. If you're using Maven as a build system, framework support needs be added on the root module only. Alternatively, you can repeat the steps for all modules that you want to use IntelliJ AEM's functionality with.
Marking JCR content root foldersNEW
IntelliJ AEM adds numerous features for JCR content stored in FileVault's custom XML format. Folders that contain such content need to be marked as JCR content root, which helps the plugin to distinguish it from other content.
As a visual aid, folders and their child folders and files will be highlighted using a custom background color. If you're not happy with this highlighting you can disable it or change the color in Preferences / Appearance & Behavior / File Colors.
Marking every folder as JCR root might be tedious for projects with many modules. To simplify this task,
folders that follow common naming patterns, for example jcr_root, are automatically detected
whenever a project is opened, a source root is modified, or a module is added. A notification will then
allow you to mark all detected folders as JCR root.
Prior to version 1.9.0, folders containing your JCR content must be marked as Resources Root. Otherwise, IntelliJ AEM will not properly recognize them as JCR content roots.
Configuring AEM Instances
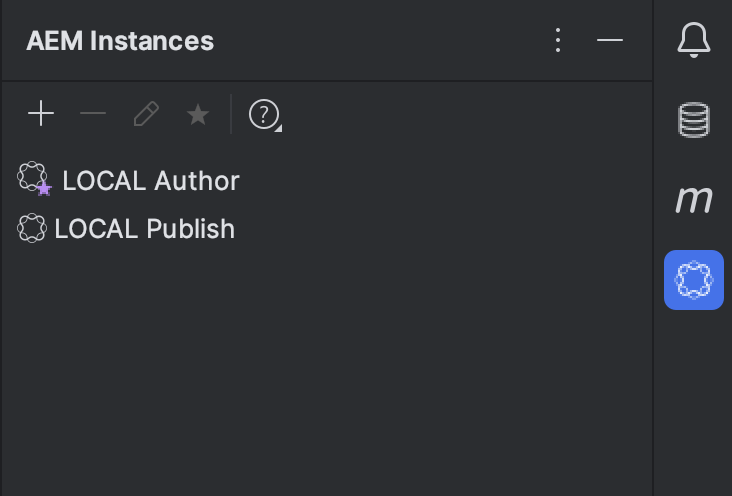
In order to benefit from the full auto-completion potential, you need to have an instance of AEM running that can be indexed by IntelliJ AEM. After the plugin has been added for at least one module, you can use the AEM Instances tool window to configure your AEM instances.
Open the tool window and click the plus icon to add a new instance to the list. In addition to a display name
and the instance's URL (e.g. http://localhost:4502), a username and password are required.
Please be aware that if you're not using the admin user, access will be limited to information
that is visible to your user.
As indicated by the little star icon, the instance added first will be automatically used for indexing. However, this setting can be changed at any time using the corresponding toolbar action.
In version 1.2.0, support for plain Sling instances was added to the plugin.
This requires a bit of configuration though, as Sling differs in its setup compared to a typical AEM
instance. You specifically need to configure the JCR mountpoint to /server/default and the
OSGi framework storage path to sling/felix for all features to work.
Feature Documentation
Some of the features provided by the plugin may not be self-explanatory, so this section provides some extra documentation for them.
Pushing content to and pulling content from AEM
Pulling and pushing content is a regular task in AEM development and is usually done with content packages or with a checkout with the FileVault command line tool. IntelliJ AEM provides convenient actions now that push or pull content directly from inside the IDE without requiring one of the other means.
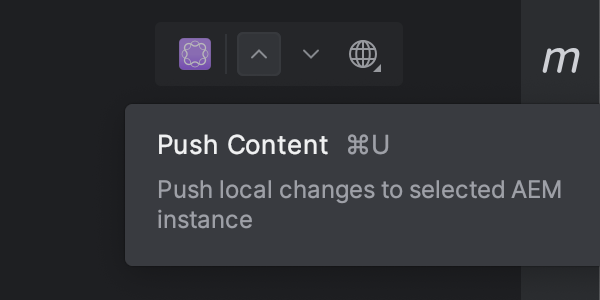
There are two ways to invoke the corresponding actions. First, from the Project tool window's context menu. Second, from the editor window's context action bar. With the former you can not only push or pull individual files, but also entire directory trees. The latter allows to conveniently push or pull the file that is open in the editor without the need to navigate through menus.
There a few things you need to keep in mind when working with these actions. When pulling content, the
module's workspace filter will be taken into account to avoid that unwanted content is included.
When pushing content, all of the content is included since you may be working on something new that's not
included in the workspace filter yet. Access control policy files such as _rep_policy are
generally ignored to avoid unexpected side effects.
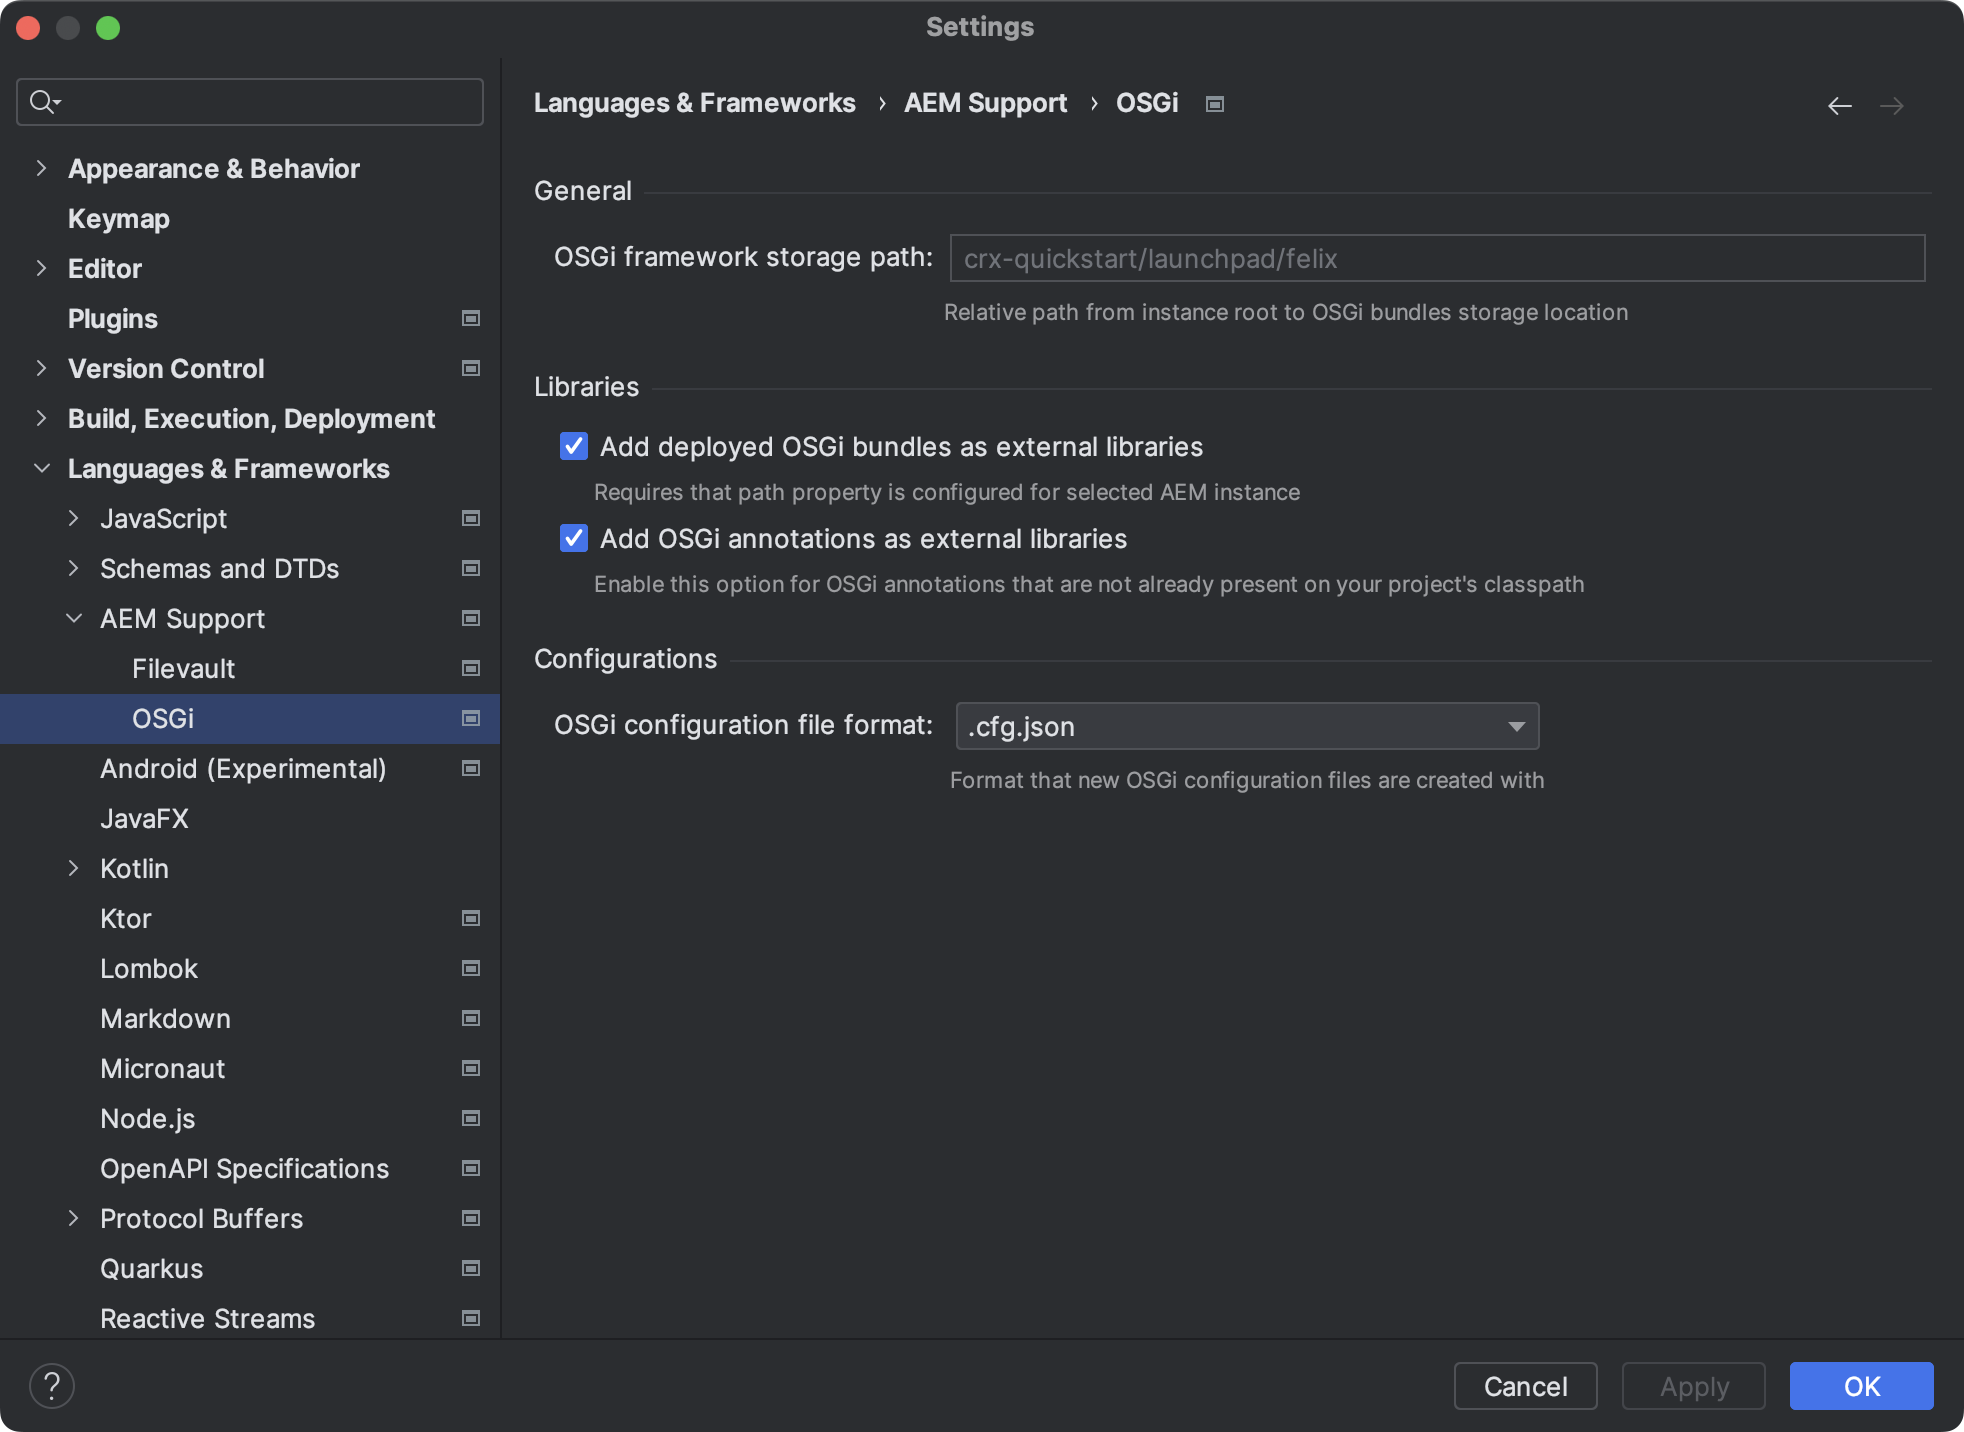
Adding deployed OSGi bundles as external libraries
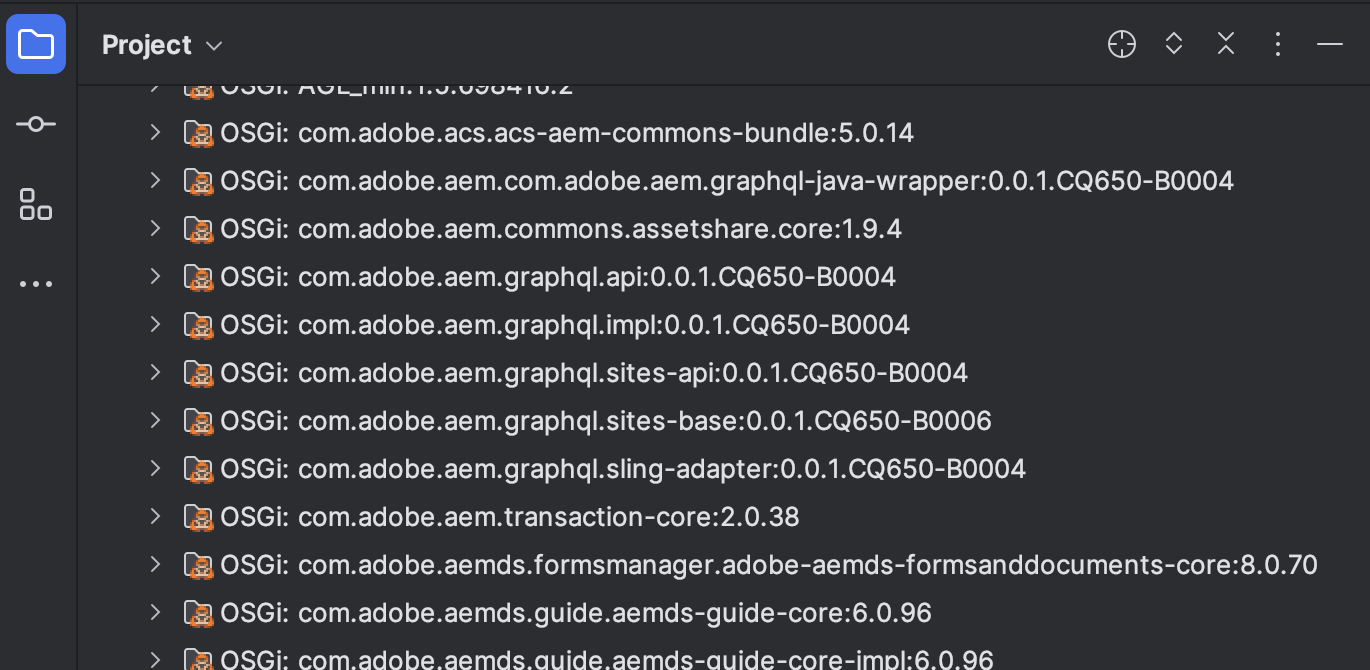
In version 0.7, IntelliJ AEM introduced a new feature that adds the OSGi bundles that are deployed to your AEM instances as external libraries to your projects. This has a number of advantages. Most importantly, it allows you to debug code that is not available as public libraries, for example via Maven repositories, and helps with troubleshooting problems that are not directly originating from your code. In addition to that, IntelliJ IDEA will index them and you can also benefit from code completion that is based on private classes such as OSGi components provided by AEM.
For this feature to work, you need file system access to the directory where your AEM instance is stored.
Select your preferred instance in the AEM Instances tool window and open the properties dialog.
Now enter your instance's base directory, i.e. the directory that contains the crx-quickstart,
into the Path and confirm by pressing the OK button. IntelliJ AEM will now automatically
search for all OSGi bundle JARs and add them as external libraries to your project. To see those libraries,
open the Project tool window and expand the External Libraries node at the bottom.
Additionally, a file system watcher is set up to make sure the list of OSGi bundles is always up-to-date
when new bundles are installed.
If you don't want to use this feature, you can disable it in Preferences / Languages & Frameworks / AEM Support / OSGi.
Compatibility
Since 1.11.0, IntelliJ AEM is compatible with all major JetBrains IDEs with version 2023.1 and higher.
Feedback and Bug Reports
IntelliJ AEM benefits a lot from bug reports and general user feedback, so please get in touch using one of the channels below. I'm looking forward to hear from you.
Errors reported by IDE
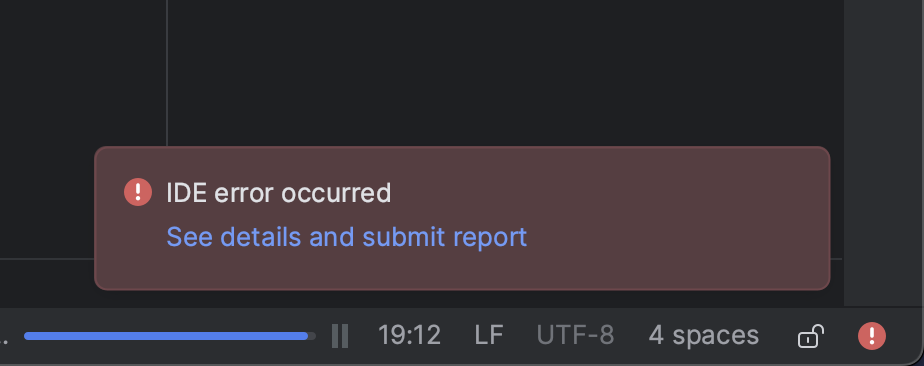
In many cases, when you run into a bug an exception is thrown, and you'll get IntelliJ IDEA's error report popup. When clicking the link in the popup you'll see the error that occurred, and you can enter additional information that may help resolving the issue. Please provide as much information as you can.
When you finally click the Report by email button, IntelliJ AEM's custom error reporter will send an email containing the stacktrace and any additional information you provided. It will also include IntelliJ IDEA's and the plugin's version.
If something is not working, but no error is reported by IntelliJ IDEA, or if you simply want to give feedback, please send an email. Please also include any steps necessary to reproduce the issue and your IntelliJ IDEA's and the plugin's version.
Gitter
There is also a community on Gitter now where you can ask questions, discuss features or suggest improvements.